Hey folks, if you’re here because you’ve ever stared at a jumbled mess of motor coils that left your assembly line delayed, or you’re tired of motors that sputter instead of run, you’re in the right spot. I’ve been supplying motor coils for over a decade now, and let’s be real—wind the coils wrong, and even the fanciest motor parts are just fancy paperweights. Today, I’m breaking down how to wind ’em correctly, no fancy engineering degree required, and yeah, I’ll throw in a few pro tips I picked up troubleshooting for small shops and big manufacturers alike. Motor Coils
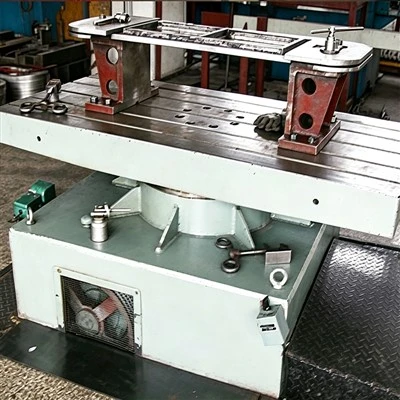
First off, let’s get one thing straight: winding motor coils isn’t just twisting wire around a metal core. It’s about precision, because every little slip messes up the motor’s magnetic field, which is what makes it spin. I’ve seen guys rush this step just to hit a deadline, and 9 times out of 10, that motor’s gonna die within a week. Let’s start with the basics you can’t skip—prepping the materials, because garbage in, garbage out, right?
Wait, before you even touch a wire, you gotta check your supplies. First, the wire itself. Most small motors use enameled copper wire (magnet wire) because it’s durable and conducts well. But not all enamel is the same—some breaks down if you wind it too tight, others fray if you rub it against the core too hard. I always tell my customers to stick to the gauge we supply, because that’s what we tested for our coils. If you use a thinner wire, you might get more turns, but it’ll overheat fast. Thicker? You can’t fit enough turns, so the motor loses torque. Also, check for nicks in the wire insulation—even a tiny nick shortens out two turns, and that’s a dead spot in the magnetic field. I keep a wire scrapper on my bench for this; just run it lightly over the insulation to make sure there’s no hidden damage before you start.
Next, the core (that’s the iron or steel lamination stack you wind around) and the form it sits in. If the core’s warped, or the form has rough edges, that’ll chafe the wire as you wind. I once had a customer who swore our coils were bad, but it turned out his core had a burr from a bad cut—half the coils had frayed wires, and we had to rework his entire batch. So inspect every part before you start. Even a tiny burr can ruin a whole winding job.
Now, onto the actual winding. Let’s talk about technique—this is where people mess up. First, tension. You can’t pull the wire too loose or too tight. Too loose, and the coils shift when you run the motor, causing vibration and overheating. Too tight, and you crack the insulation, or even bend the core pins if you’re winding around a stator. I use a hand-held tensioner that’s set to a specific weight—usually around 1 to 2 pounds for small motors, adjust for bigger ones. If you’re doing this by hand (no machine), don’t yank. Let the wire feed slow and steady, keeping tension even as you go.
Then, lay the turns evenly. This is called “layer winding” or “random winding,” depending on what you need. For most small motors, you want to lay each turn right next to the previous one, no gaps, no overlapping. If there’s a gap, the magnetic field is weaker there, so the motor has to work harder. If overlaps happen, the insulation gets squeezed, breaks down, and short circuits. Pro tip: I always mark the first turn with a piece of tape so I don’t lose count. You need exactly the right number of turns for the gauge and core—too few, low torque; too many, it draws too much power and burns out. I supply a turn count sheet with every coil order, so if you’re rewinding, that’s a quick reference to not mess up.
Wait, what about when you wind multiple layers? Oh, right, that’s another spot people go wrong. If you’re doing two or more layers, you want to stagger the start of each layer. Like, if the first layer starts at the left end, the second should start a quarter of an inch over, not right on top. That prevents the coils from piling up too high, which can cause friction when the rotor spins. Also, after each layer, put a thin layer of insulating paper between it and the next. This is non-negotiable—even if your wire has super thick insulation, cross-layer shorts are way too common to skip this. I’ve had customers skip that step and end up with 10% of their motors failing in testing, just because two layers touched and shorted.
Now, after you wind the coils, you gotta secure ’em. Wound coils aren’t much good if they unravel when you handle them. Most of the time, I use a high-temperature fiberglass tape to wrap the whole coil pack. Make sure it’s tight but not so tight it crushes the coils. For bigger motors, some people use epoxy, but only cure it at the right temp—too hot, and the enamel insulation melts; too cold, and the epoxy doesn’t set right. Also, don’t tape over the lead wires’ ends—you need to strip those a half inch or so to connect to the motor’s terminals later. I use a wire stripper with a gauge matched to the wire, so I don’t nick the copper when stripping.
Wait, let’s talk about common mistakes I see all the time. One: mixing up the start and end of the coil. If you reverse the leads, the magnetic field spins the wrong way, so the motor runs backward. That’s not a big deal for fans, but for pumps or conveyor motors? Total disaster. I always test continuity with a multimeter after winding—you should get a consistent resistance, no open circuits or short circuits. If the resistance is way too low, you have a short; way too high, you missed a turn. Fix that before you put the coil in the motor, not after.
Another mistake: not accounting for wire expansion. When the motor runs, the wire gets hot, so it expands a little. If you wound it super tight cold, when it warms up, it might stretch or break. I once had a customer who wound coils for a freezer motor, and they kept breaking in winter—turned out he pulled the wire too tight, and when it cooled down, it contracted and snapped. Lesson learned: leave a tiny bit of slack, enough to let the wire expand when hot.
Now, if you’re using a winding machine, not hand-winding? Same rules apply, but you can get more consistent turns faster. But even machines mess up if you don’t calibrate them. Every time you switch wire gauge or core size, calibrate the tension and turn count. I’ve seen machines wind 100 perfect coils, then skip a turn because the feed got jammed, and that whole batch was trash. So spot-check every 10 or 20 coils when you’re running a machine batch.
Let’s also touch on different motor types, because winding a DC motor is different from an AC induction motor, right? For DC motors, you usually have armature coils that are wound in slots, so you have to make sure each coil fits exactly in its slot, no overhang that rubs the commutator. For AC stators, it’s often distributed winding, where coils are spread across multiple slots to get a smooth magnetic field. If you bunch all the coils in one spot, you get torque ripple, which makes the motor noisy and less efficient.
Wait, let’s get real—this stuff works because I’ve tested it so many times. Last year, I had a guy who was buying cheap coils from another supplier, and his motor failure rate was 15%. He switched to our coils, and he cut that failure rate down to under 2%. Why? Because we wind ’em with consistent tension, correct turn counts, and check every single coil before it leaves our shop. That’s the thing—correct winding isn’t just the technique, it’s the checks along the way. Don’t wait until the end to test, test every step.
Let’s recap the quick checklist, so you don’t forget:
- Inspect all parts: No burrs on cores, no nicks on wire.
- Set correct tension: Not too tight, not too loose.
- Lay turns evenly, no gaps or overlaps.
- Stagger layers and add insulating paper between them.
- Secure coils properly, leave lead ends exposed.
- Test continuity before installing.
I know, I know, it’s a lot, but once you get the rhythm, it’s way easier than reworking a whole batch of bad motors. And honestly, if you’re someone who sources motor coils for your business, don’t risk cutting corners here. A bad coil doesn’t just waste your time—it can damage the whole motor assembly, leading to way bigger costs down the line.
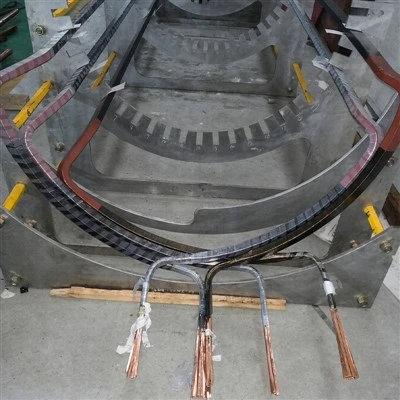
If you’re working on a custom motor, or you’ve had trouble with consistent winding results, hit me up. I’ve been in this game long enough to troubleshoot just about any coil winding issue, whether you’re a small garage shop or a mid-sized manufacturing line. We supply motor coils built to hold up, because we know how important a good, smooth-running motor is to your business.
Stator Coils References
- Electric Motor Repair and Rewinding Handbook, McGraw-Hill
- NEMA Standard for Small Electric Motors, National Electrical Manufacturers Association
- Wire and Cable Technology for Electrical Machines, IEEE Press
- Practical Coil Winding Techniques for Rotating Machines, Industrial Press
Hangzhou Purun Science & Technology Co., Ltd.
As one of the most professional motor coils manufacturers and suppliers in China, we have world-leading production equipment and strong manufacturing capabilities. Please rest assured to wholesale customized motor coils made in China here from our factory. Welcome to contact us for pricelist.
Address:
E-mail: Purun_sci_tech@163.com
WebSite: https://www.puruncoil.com/
