If you’ve ever walked into a finished basement, a sunroom, or a commercial space with a sloped ceiling, you’ve probably noticed how the right ceiling material can turn an awkward architectural feature into a standout design element. As a PVC ceiling panels supplier, I’ve seen firsthand how sloped ceilings can trip up even experienced do-it-yourselfers—but with the right process, PVC panels are one of the most reliable, low-maintenance ways to finish them. Unlike drywall, which cracks easily on slopes, or wood, which warps with humidity, PVC is lightweight, moisture-resistant, and flexible enough to follow the angle of a sloped ceiling without extra stress. Over the last 10 years, I’ve worked with hundreds of contractors and homeowners who’ve skipped costly professional installs and gotten great results, as long as they follow a clear, step-by-step process tailored specifically for sloped surfaces. PVC Ceiling Panels
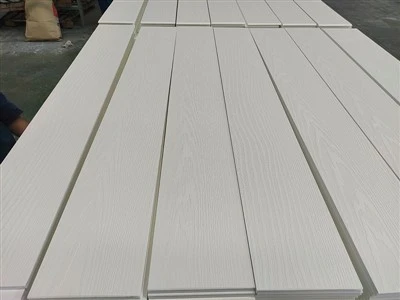
First, let’s talk about why sloped ceilings are unique when it comes to installing PVC panels. A flat ceiling lets you work at a steady horizontal plane, but a sloped one means every cut, measurement, and fastener has to account for the angle of the roof rafters or substructure underlay. Too many people rush through measuring and end up with panels that don’t meet at the peak or the edges, leaving gaps that can let moisture seep in—especially if your sloped ceiling is in a bathroom, basement, or outdoor overhang. That’s why the first critical step is pre-installation prep, which is non-negotiable for sloped surfaces.
Start by clearing the ceiling area. Remove any existing materials: old plaster, drywall, or popcorn texture, using a respirator if you’re disturbing old material that might contain asbestos. Next, inspect the underlying structure—PVC panels work best over a solid, smooth base, like ½-inch plywood or oriented strand board (OSB), or even sturdy furring strips if your ceiling has exposed rafters. For sloped ceilings, furring strips are often the easiest choice because they create a flat, uniform surface for attaching panels, even if your rafters are uneven. You’ll want to space furring strips 16 inches apart along the slope, matching standard stud spacing, and fasten them to rafters with 2½-inch wood screws, making sure each strip is leveled with a torpedo level. A common mistake here is not adjusting furring strips to follow the slope’s angle; if they’re too flat or too steep, your panels will look crooked and won’t sit properly.
Next, measure the sloped ceiling accurately. This is where many DIYers go wrong—measuring horizontally instead of along the slope, which leads to incorrect panel sizes. To get the right length for each panel, hold a tape measure along the slope from the edge of the ceiling to the opposite edge (or to the peak, if the ceiling meets at a sharp angle). For the width, each standard PVC panel is usually 12 inches wide, so you’ll need to count how many panels fit across the ceiling, leaving a ¼-inch gap at each edge for expansion. PVC expands and contracts slightly with temperature changes, especially in spaces with big shifts (like sunrooms or attics), so that small gap prevents warping. If your final panel at the edge is narrower than 6 inches, it’s better to trim one of the middle panels slightly to keep all panels uniform—narrow end panels look messy and are more prone to falling off.
Once measurements are done, gather your materials and tools specifically for sloped ceilings. You’ll need PVC ceiling panels (obviously, as our supplier, I recommend choosing panels with interlocking edges—these are designed to click together easily, which is perfect for sloped surfaces where you can’t use glue for every joint). For fasteners, use 1½-inch galvanized finishing nails or PVC-specific screws; regular nails can rust and stain the panels over time. Tools you’ll need include a circular saw or jigsaw with a fine-tooth blade (to cut PVC cleanly without chipping), a tape measure, torpedo level, chalk line, rubber mallet, and a utility knife. For sloped installations, a helper is almost essential—lifting and holding panels in place along a steep slope is hard to do alone, especially at the peak of the ceiling.
Now, the installation process itself. Start at the lowest point of the slope, not the peak—this is another key rule I’ve learned through trial and error. If you start at the top, gravity will pull panels down as you work, making them slip and gaps form. Working from the bottom up ensures each panel sits securely before you add the one above it. First, attach a starter strip along the bottom edge of the ceiling, using your chalk line to mark a straight line parallel to the slope’s base. The starter strip should be the same thickness as your PVC panels, so it creates a flush edge. Secure it to the furring strips with screws, making sure it’s aligned with your chalk line.
Next, take your first full panel, lift it into place along the starter strip, and slide its interlocking edge into the starter’s groove. Press firmly along the edges with a rubber mallet (cover the mallet with a soft cloth to avoid dents) to make sure the joint clicks tightly. Once the panel is in place, fasten it to the furring strips every 12 inches along its edges, driving the screws or nails through the panel’s edge—never through the middle, as this can crack the PVC. For sloped ceilings, it’s helpful to pre-drill small holes for fasteners; this prevents the panel from splitting, especially when working along the sharp slope angles near the peak.
Once the first panel is secure, fit the next panel into place: slide its female edge into the male edge of the first panel, align it so it’s straight along the slope, and tap it with the rubber mallet until it locks. Repeat this process, working your way up the slope until you reach the peak of the ceiling. At the peak, you’ll have to cut panels to fit the angled join. Measure the angle of the peak with a protractor or by holding a scrap of panel against the slope, then cut the panel’s edge to match that angle. Leave a ¼-inch gap at the peak too, for expansion, and fasten the cut panel securely.
For the edges of the ceiling (where the slope meets the walls), you’ll need to use trim pieces. PVC corner trim and edge trim are specially designed to cover the gaps between panels and walls, giving the finished look a clean, professional touch. Cut the trim to match the slope’s angle, and attach it with small nails or adhesive made for PVC, making sure it’s aligned with the panels. If your sloped ceiling has any vents, light fixtures, or other openings, measure the opening, cut a hole in the panel with a utility knife or jigsaw, and fit the panel around the fixture. It’s a good idea to seal these edges with silicone caulk to prevent drafts or moisture from getting in.
Wait, I want to address a common concern I hear a lot: can you install PVC ceiling panels on a steep slope, like 45 degrees or more? The short answer is yes, but you need to add extra fasteners. For slopes steeper than 30 degrees, space your fasteners every 8 inches instead of 12, and use thicker panels (10mm or more) instead of the standard 8mm—thicker PVC is more stable and less likely to shift on steep angles. I always tell customers who are tackling a steep slope to use the interlocking system exclusively, as it adds extra support that glue alone can’t provide.
Another tip from years of experience: test a small section first. If you’re working on a complex sloped ceiling with multiple peaks or valleys, cut a scrap panel to match a small section of the slope and practice locking it in. This lets you work out kinks in measurement and cutting without ruining a full panel. Also, make sure the space is well-ventilated while working with PVC adhesives or caulk—though PVC itself is low-VOC, installation products can have strong fumes, so open windows or use a fan.
When you’re done, step back and check for gaps or uneven panels. Tap along every joint to make sure they’re tight, and run your hand along the slope to feel for any warping. If you notice a panel is loose, add a few more fasteners along its edges. The best part about PVC panels is that they’re low-maintenance—you can wipe them clean with a damp cloth, and they won’t yellow or stain over time, even in high-humidity spaces like bathrooms or laundry rooms.

If you’re ready to start your project and need high-quality PVC ceiling panels tailored for sloped ceilings, our team can provide guidance on panel thickness, trim pieces, and tools, plus bulk pricing for contractors or homeowners tackling larger spaces. Contact us today to discuss your specific sloped ceiling project and get a customized quote that fits your budget and needs.
PVC Advertising Board References
- National Association of Home Builders (NAHB). "Guidelines for Installing Plastic Composite Ceiling Materials in Residential Spaces." 2022.
- PVC Industry Association. "Best Practices for Sloped Ceiling Panel Installation." 2021.
- U.S. Department of Energy. "Moisture-Resistant Building Materials for High-Humidity Ceilings." 2020.
- Professional Remodelers Organization (PRO). "Common Mistakes in Sloped Ceiling Finishes." 2023.
- International Code Council (ICC). "Residential Building Code for Ceiling Fastener Spacing on Sloped Surfaces." 2022.
Jameson Performance Plastics Co., Ltd.
With abundant experience, we are one of the most professional PVC ceiling panels manufacturers in China. We warmly welcome you to wholesale customized PVC ceiling panels at competitive price from our factory. If you have any enquiry about free sample, please feel free to email us.
Address: No.97 Liuquan Road, Zibo city, Shandong, China.
E-mail: info@jamesonplastics.com
WebSite: https://www.jamesonplastics.com/
